Showing posts with label party. Show all posts

Jul 6, 2017

Harry Potter inspired invitations

A few weeks back I shared with you my Harry Potter themed 30th birthday party (see it here) and completely forgot to show you the invitations! I love invitations and feel like they really set the tone for the event! It was only fair that these beauties get a post all to themselves. 

The invitations were made to look like the real Marauder Map you see in the Harry Potter films! I purchased the digital personalized invitation from this Etsy Shop (Gilmourdesigns). 
The invitation was a printable item and I printed everything at home and assembled it myself! 

It was truly time consuming but was absolutely so worth it! I loved it and my guests enjoyed getting this piece of magic in the mail! 

Each invitation was printed on three individual resume papers, cut, glued and assembled with love!

My first attempt was done using regular computer paper to make sure I got it done right! After the first one I knew exactly what to do and it made the assembly process much quicker!

Once folded together I tied the "map" in twine!


If you look at the bottom left of this photo you will see my footprints on the map!
Little details like this make me swoon!


Once completely opened the invitation looked like this! You could also find the whereabouts of Harry and Hermione!


And because detail is everything to me...I had to wax seal each envelope with the official Hogwarts Seal!


Oh and yes these are Harry Potter stamps!!!!


I found the Hogwarts seal kit and stamps at Universal Studios in Los Angeles.


I hope you enjoyed looking at my invites as much as I did :)

Is it too soon to throw another Harry Potter themed party!?!

| Sources |

- Invitation design by Gilmourdesigns on Etsy
- Resume Paper to print invites on from Amazon
- Kraft Envelopes from Amazon
- Similar Hogwarts Seal from Amazon (and cheaper than what I bought mine for)
- Red wax for seal from Amazon
xoxo
Jocelyn

Feb 19, 2017

Minnie + Mickey Mouse party favors

The party favors for Charlotte's birthday party were easily my favorite part of the party prep. They were quick and easy to pull off and the kids loved them! 


I bought the kraft paper bags from Hobby Lobby and glued the Mickey + Minnie cut outs from Dimenchon's Delightful Designs on them and voila a completely custom favor bag.


The kiddos went home with a custom Mickey Mouse coloring book, Mickey/Minnie Ears, gummie snacks and a custom cookie

The custom Mickey Mouse coloring books are from Dixie Delights Blog on Etsy and they were such a big hit with the littles :) If you haven't check out Amanda's blog you absolutely have to and if your a fellow disney lover you won't be disappointed!

The Mickey and Minnie ears were a steal from Amazon

And I can never have a party with custom cookies from Mpressive Creations!


xoxo
Jocelyn 

minnie + mickey mouse party

Earlier this month we celebrated a few birthdays, including my sweet little Charlotte's second birthday!

Considering shes only seen a few episodes of Mickey Mouse Clubhouse yet her love for Minnie and Mickey runs deep. So when it came to her party I knew what theme we had to do! Because of the location of her party I could only do so much in terms of decorations so I had to get creative. The party favor bags and cake served as the focal point of the party. Simple yet so effective. I loved how everything turned out and so the birthday girl!

I forgot my camera at home so my cell pictures will have to do :)


Party details:

Charlotte's onesie is from My Charming Charlotte on Etsy
Charlotte's crown is from Little Blue Olive on Etsy
Party favor bags diy project made with paper bags from Hobby Lobby and Minnie and Mickey cut outs from Dimenchons Designs on Etsy
Cake and cupcakes from my local market
Custom cookies from local baker Mpressivecreations
Invitation from Mallory Hope Design on Etsy
Glitter "2" birthday candle from Home Adventures on Etsy
Big Number 2 with Mickey ears diy project made with paper mache number from Hobby Lobby and ears made from black card stock
Banner with Charlotte's name made with scrapbook paper and kraft paper banner from Hobby Lobby

 xoxo
Jocelyn


Aug 23, 2016

diy zootopia inspired favor bags

Yesterday I shared some photos of my daughters birthday party. Today I wanted to share a little more of the details behind the party favor bags!

When it comes to putting together favor bags I always start off with a plain brown lunch bag!
For two reasons!
(1) They are a blank canvas that you literally can do anything with!
(2) They are ridiculously affordable!

I knew right off the bat that I wanted these favor bags to represent the theme in a not so in your face way.

To represent Judy Hopps I went with the carrot and for Nick Wilde I went with the pawpsicle.  And to my surprise the kiddos totally understood the references!

I can't draw to save my life so I used templates I found on the internet. 

A template, construction paper, glue stick and brown lunch bag is all you need! 


Inside the party favors our guests were treated to some of Cailee's favorite things!

Candy necklace and bracelet (not pictured)
Play doh
Judy Hopps coloring page
Zootopia fruit snacks (not pictured)
Custom sugar cookies


The adults at the parties went home with their pick of a custom sugar cookie by Mpressive Creations :)


xoxo
Jocelyn

Aug 22, 2016

party time

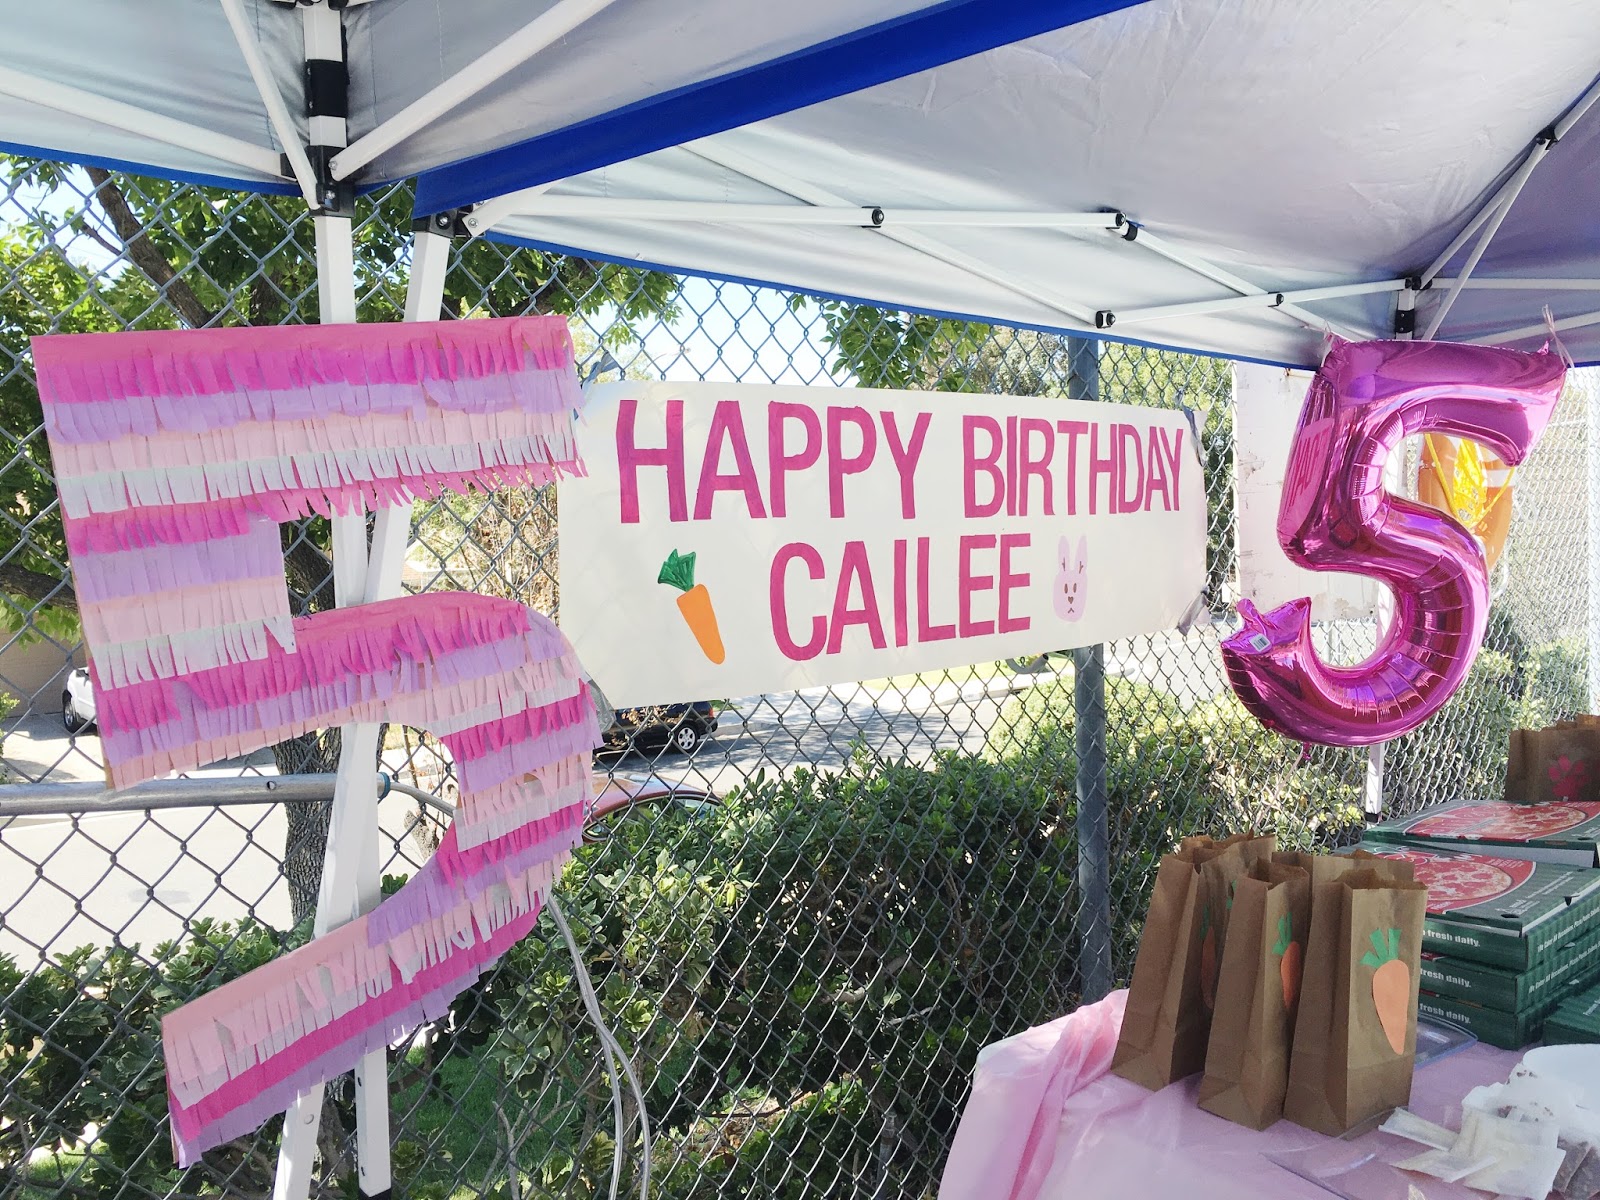
Two weeks ago we celebrated Cailee turning 5 years old with a fun pool party! SADLY these were the only photos I managed to get of the party! 

Cailee really wanted a Zootopia party so I did my best to incorporate small details where I could. Because we had the party at our community pool we are limited on how we can decorate etc but everything came out great!


Just like always my sister made the cupcakes and cake for the party. And just like every other year they were a big hit!


The party favors had paws and carrots on them to represent Nick Wilde and Judy Hopps from Zootopia! 

The cookies were made by a local baker and boy were they absolutely delicious! 


Cookies made by Mpressive Creations (located in Southern California)!

Stay tuned this week for some extra party details.

xoxo
Jocelyn


Aug 9, 2015

finding nemo party {free printables}


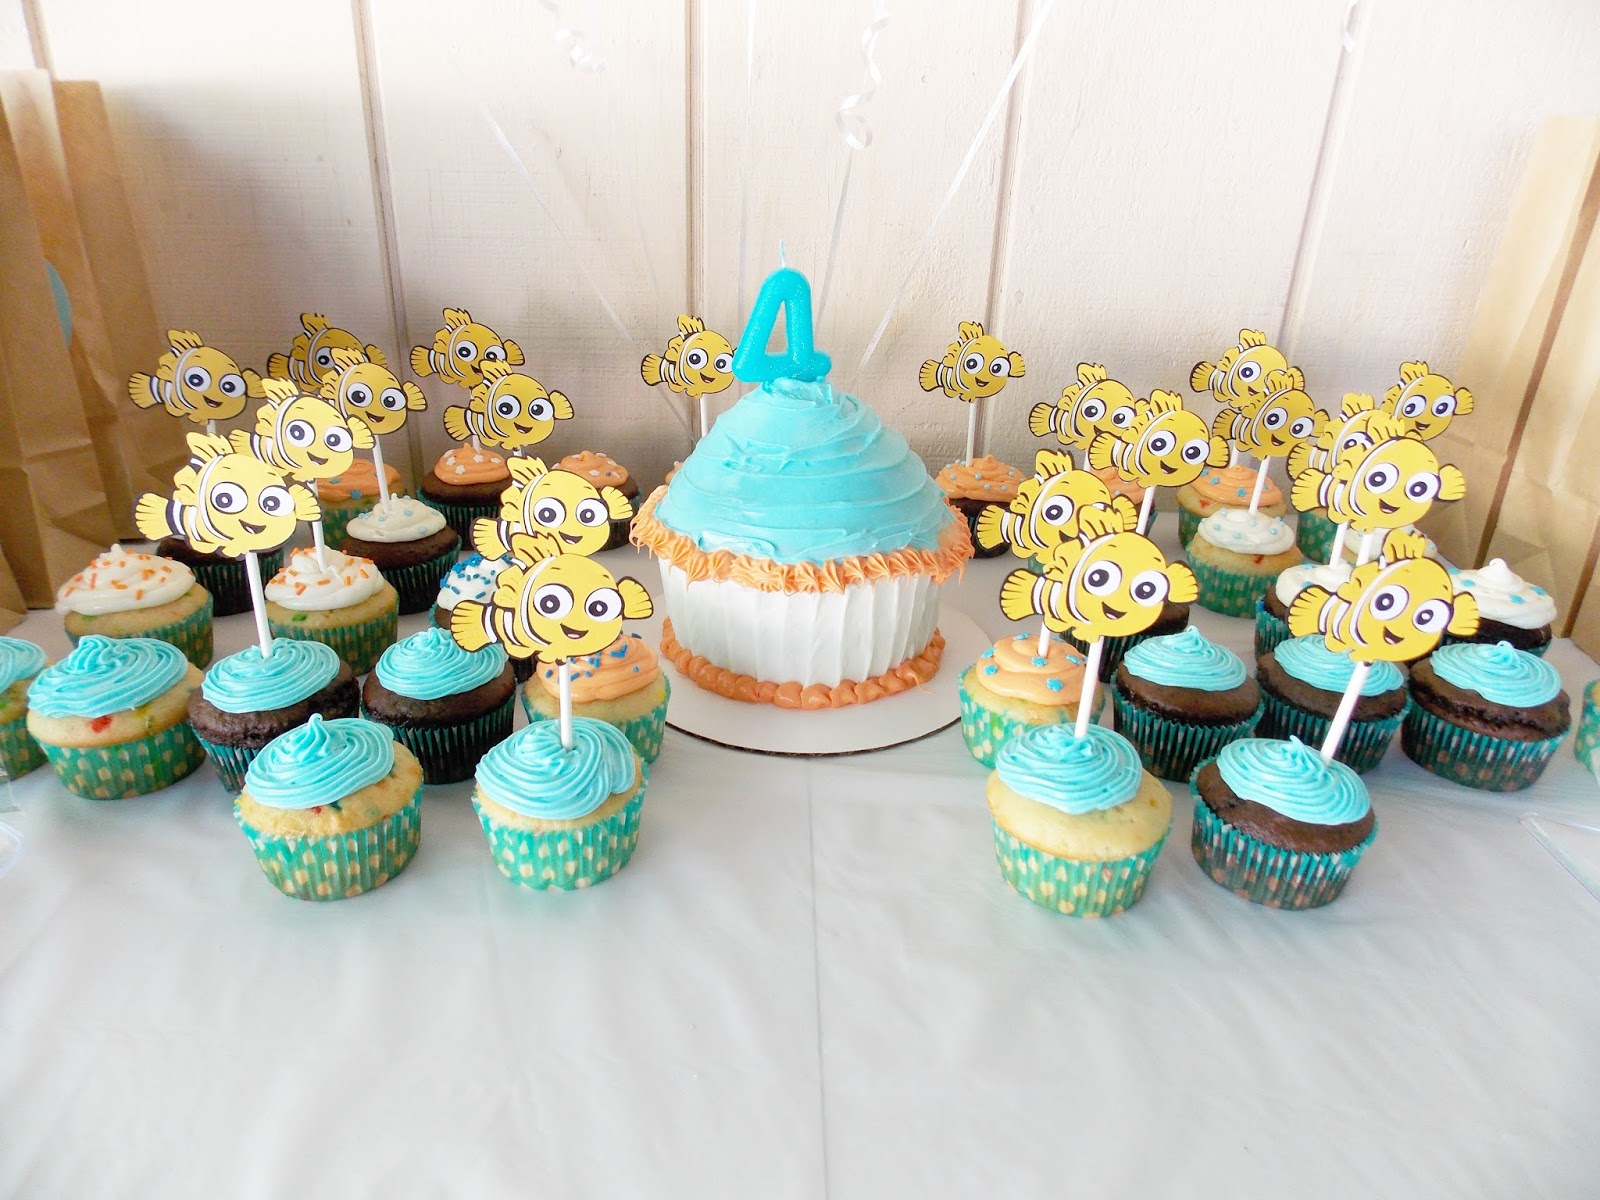
This weekend we had ourselves a Finding Nemo themed pool party for my almost 4 yr old. 
My daughter just recently saw the movie and it has been her absolute favorite these last few weeks. 
So obviously when party planning started all I kept hearing was pool party and nemo. 

I really thought this would be the easiest thing to pull off until I hit up my party decoration go to places (Target and Party City) to find absolutely nothing with Nemo on it. I did find Nemo products online but add in shipping and it was more than I wanted to spend on decorations I didn't really care for. 

After hours of scrolling thru Pinterest for ideas I decided to go the route many other woman before me had done. Make the decorations myself and hit up Etsy for anything else. 

Thanks to my photoshop and Etsy I was able to put together a fun little party that my kid absolutely loved and was kind to my wallet! Win and Win! 


I made this tissue fringe backdrop using the tutorial found here. The backdrop was so easy and cheap to make! Helpful tip: I bought 2 foam boards at the 99 cent store and taped them together to get the size I wanted!!  


Sister if you are reading this Thank you so much for making the cake and cupcakes!!


The favor bags were sweet and simple. I was determined to use whatever I already had on hand. The bags themselves were your plain old paper lunch bags. I just slapped on some Thank You stickers and voila instantly pretty! I made the coloring books on photoshop and the kids loved them!


Because I had such a hard time finding nemo goodies, I decided to lend a helping hand! If you find yourself throwing a nemo party use these free printables!!

Helpful tips: I printed the tags on regular computer and just cut them out (you can use card stock as well).
For the thank you tags I printed them on sticker paper and cut them out and stuck them on baggies!

Super easy and will add the Nemo details your kiddo will love!


Party Details
  • "Happy Birthday Cailee" nemo banner - I made on photoshop and will be sharing it as a free printable here!
  • Tissue Paper for backdrop was purchased at Party City
  • Nemo cupcake toppers from Etsy
  • Number 4 candle from Party City 
  • Nemo and number 4 cookies from Auntie Apple

xoxo
Jocelyn

Aug 8, 2015

gender reveal party {free printables}

As promised in yesterday's post today I am sharing with you free printables. So if you or anyone you know is hosting a gender reveal party feel free to use these goodies!!

If you missed yesterday's post here is how I used the printables at my gender reveal party!


post signature

Aug 7, 2015

flash back friday {gender reveal party}

My baby girl turned 6 months this week and I am in major denial. I love watching her grow and reach new milestones but it also makes me incredibly sad. Why must they grow up so quickly?!?!

So instead of ugly face crying I will take you down memory lane back to our gender reveal party.

We wanted to share the news with our immediate family by having a little gathering at our house.

I kept the decorations simple and sweet. 

Pink and blue balloons dressed up our entry way.

Ultrasound photos of our little one served as decoration as well.


I made the "BOY OR GIRL" banner from card stock I had (I hoard art supplies like its nobody's business). 

The "Team Blue" and "Team Pink" signs were created on photoshop! 

Photoshop is my go to all the time.


The cupcakes were just so pretty and the colors were dreamy. 


The drinks were much more vibrant in the photos than they were in real life(I have no idea why this is).  To my surprise the blue raspberry lemonade was the fan favorite. That or everyone was hinting that they thought our new addition was a boy.  


The beverage signs were also made on photoshop (surprise surprise).

I absolutely love paper straws and will always try to incorporate them in any gathering we have! I love how they dressed up the beverage station with all the fun patterns. It doesn't get any better than chevron and polka dots if you ask me.


These last two photos were taken with a cellphone so I apologize for the poor quality.

I went a little tissue fringe crazy with our wall but our family had fun taking photos in front of it. So it was well worth the effort! 

I put together our gender reveal balloon and tassel garland myself. I am so glad I did because I saved us a ton! 


The hubby and I before the big reveal!!!


And the grand reveal !!!


Party Details
  • Party Signage made on photoshop {free printables in separate post}
  • Pink and Blue cups from Target 
  • Paper Straws c/o Twigs and Twirls 
  • Gender reveal balloon from Etsy


post signature